In this project you’ll learn how to create a simple star applique design using Embrilliance StitchArtist software then apply it onto a garment. This project is perfect for 4″ x 4″ (100mm x 100mm) embroidery hoops, using machines like the Brother NV180 sewing & embroidery machine.
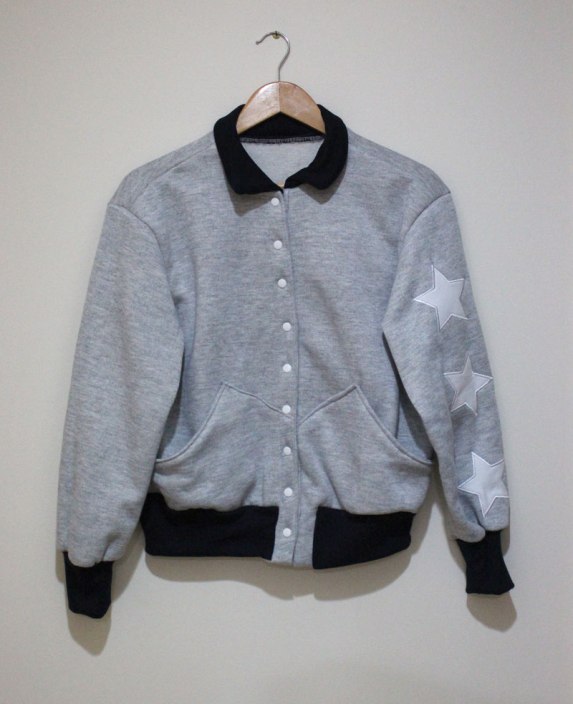
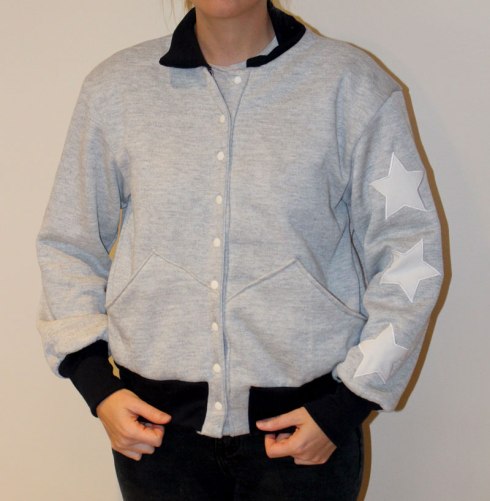
We’ve used BurdaStyle Vintage Nina Jacket sewing pattern to create a jacket using sweatshirt material
Creating the applique design
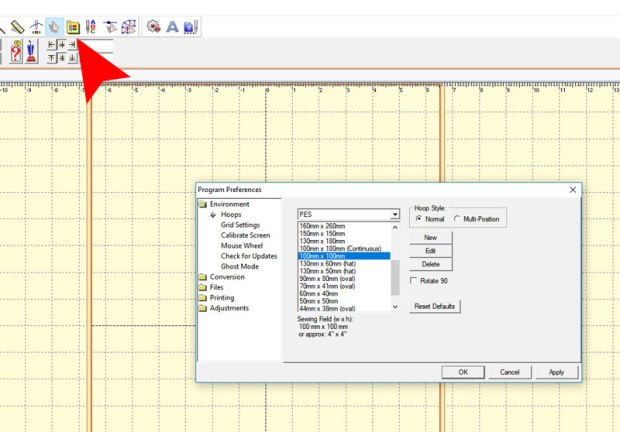
- Open Embrilliance and select the hoop size for your machine. This design will only be small, therefore you can select the 4″ x 4″ (100mm x 100mm) hoop.
- Hit the Program Preference icon and select your hoop size from the preferences.
- I want to use a star shape for my bomber jacket so I will got to the Embrilliance shape library, as shown below.
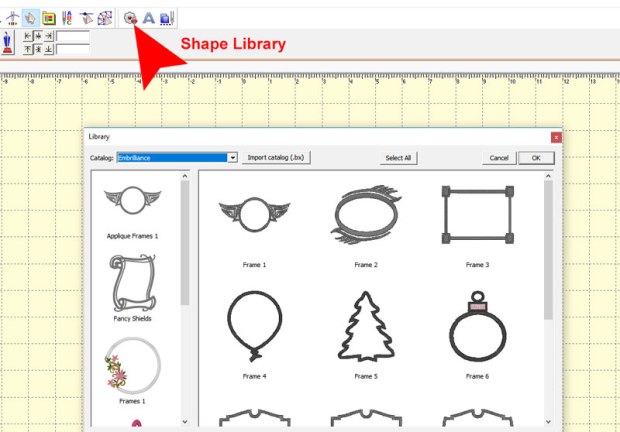 You can browse through these shapes to find something suitable for your sewing and embroidery project. For this bomber jacket I will change Embrilliance to Embrilliance: Outlines under the Catalog menu, as shown above highlighted in blue.
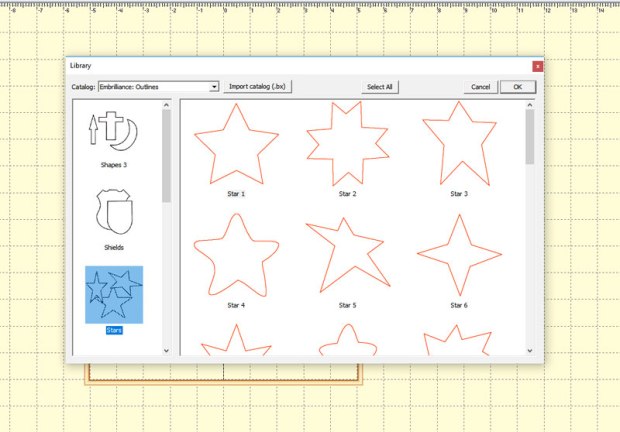
- I will now select Stars and then Star 1 for my project.
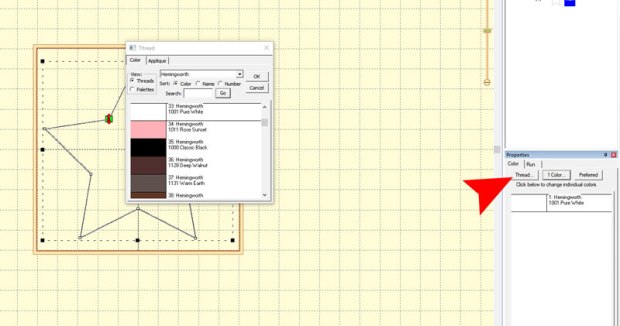
- You can set the colours of your thread if you want to match it correctly. You can do this using the right hand side menu. This will bring up the Thread Properties. Since I’m using Hemingworth I can change my settings to reflect this and select my colour.
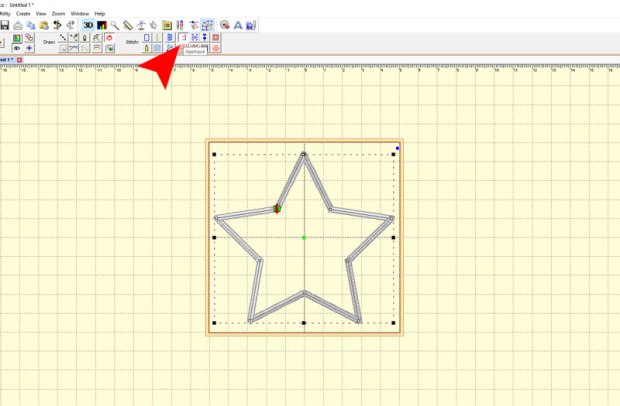
- To make your shape into an applique design, it’s quite simple. Click on the star design and choose the Applique stitch type in the top menu, shown below.
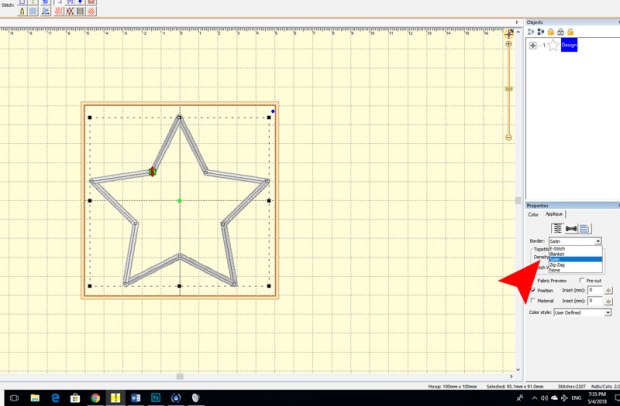
- On the right hand side under Properties you can choose what type of applique stitch you would like to go with, including an E-Stitch, Blanket, Satin or Zig-Zag stitch, as shown below.
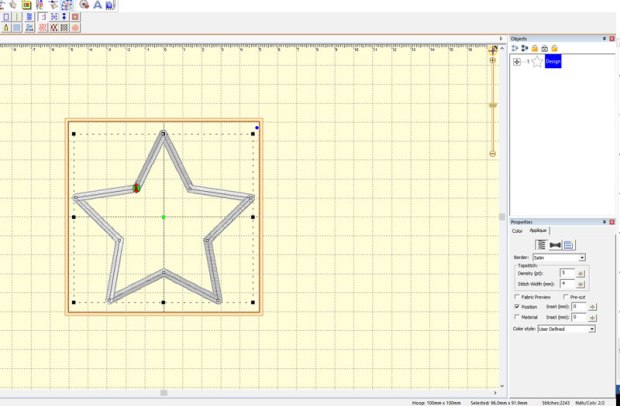
- For this project I’m going to choose the Satin Stitch. Once you have selected your Border preference you can then apply your desired settings. For my star applique I’m going to change the stitch width to be a bit wider, so I’ll update this to 4mm.
 To check the design, you can run the Stitch Simulator, which will go through the stitching process. The applique stitch has included one cream stitch, which will go down first. Once this has been stitched you can cut out the fabric from around the outside of your design and then continue with the satin stitch.
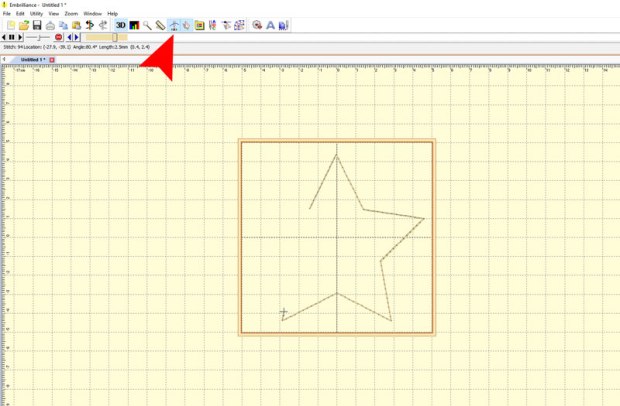 Now that I’ve checked this is all perfect and good to go, I will save my design ready to transfer onto my machine. To save my file I will select File > Save As and save it as something I will remember such as star-applique-4×4.pes (or the extension you use for your embroidery machine).
If you don’t own Embrilliance StitchArtist yet you can try out the demo version for free. You won’t be able to save design files from the demo version, but you can use this link to download the completed embroidery star files.
Applying the applique to my jacket sleeve
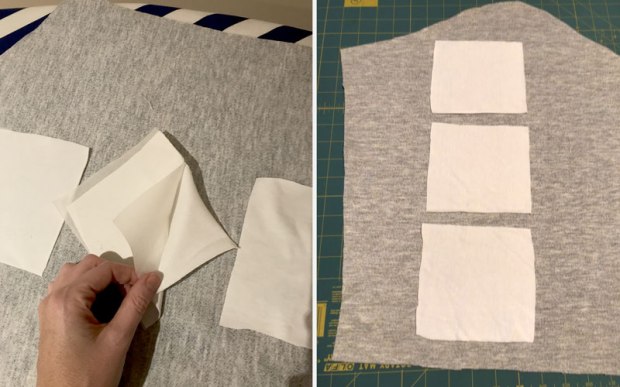
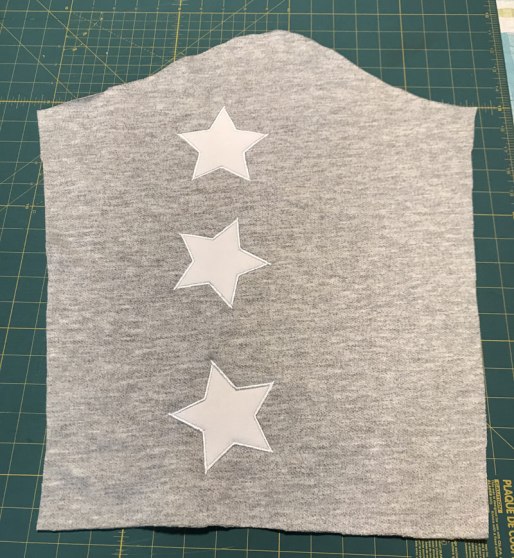
To create three stars on my bomber jacket sleeve I cut out three 100mm x 100mm pieces of white fabric from an old white T-shirt. I then applied some Hot Melt Web to the bottom of my fabric and ironed them onto my sleeve fabric piece.
This is just a really easy and great way to ensure that they will remain in position when I applique each of my embroidery designs onto the white panels.
I can now start hooping up my first 100mm x 100mm white block using the hoop design placement tool (as shown below), ensuring I have my design centred. I have also used a piece of Tearaway stabiliser underneath the grey sweatshirt material to stabilise the applique embroidery design, as shown below.
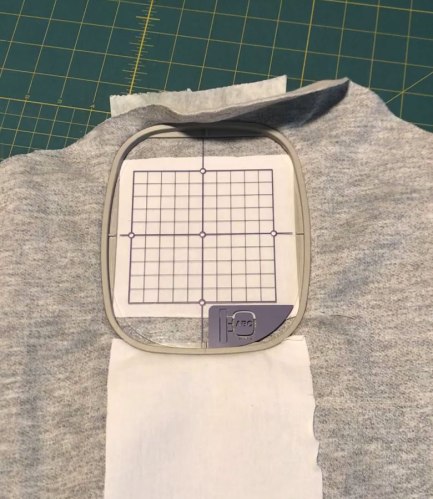
You can softly pull up the fabric around the outside of the hoop just to ensure that it doesn’t get stuck inside the hoop. If you move the fabric too much just re-hoop and ensure that this white block piece isn’t caught inside the hoop. The reason for this is because once we have stitched down the outline of the star design we need to trim away the excess fabric around the design.
Once this is complete, load your hoop into the embroidery machine and select your Star Applique Design. Since I’m using a Brother NV180 Sewing and Embroidery machine I was easily able to transfer my design from my PC and straight onto my machine using a USB drive.
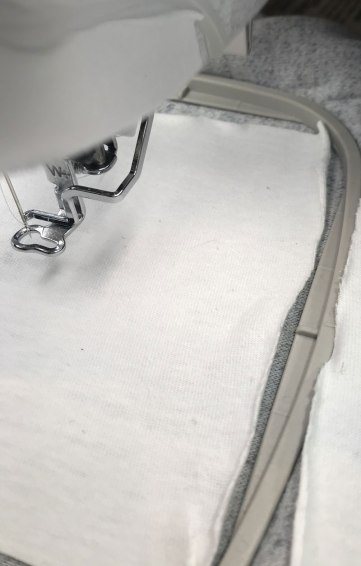
Once you have the design loaded select start on your machine and watch it stitch out the outline of the design.
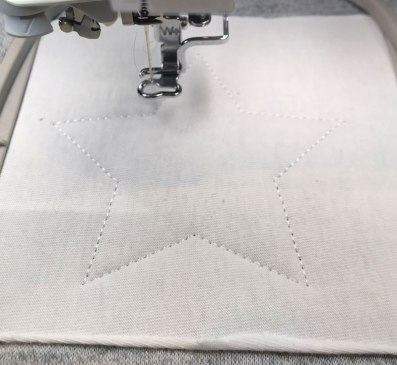
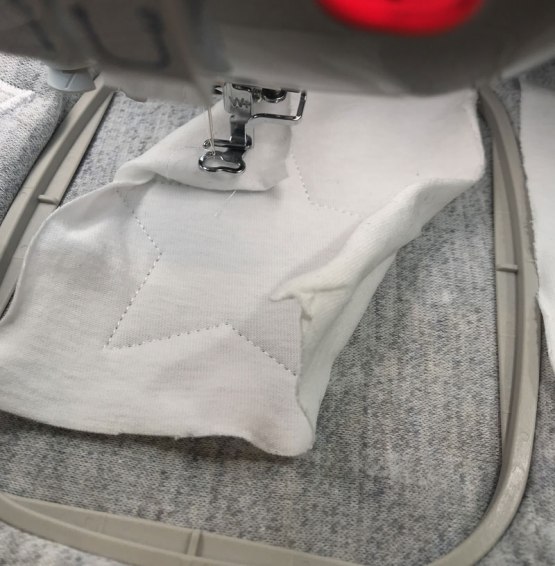
Now that you have the outline finished you can softly pull up the fabric around the outside of the star design. You may want to take the hoop out of the machine to do this to ensure you don’t move or pull on the embroidery machine arm.
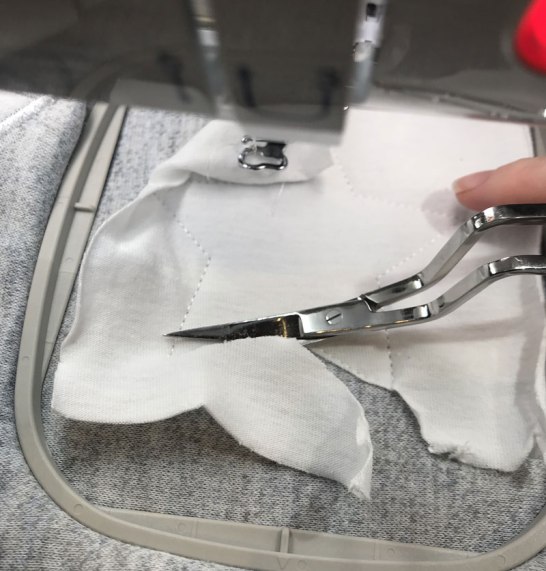
Using double-curved scissors, cut around the outside of the design. Cut as close to the stitching as possible without actually cutting through the design stitching or the garment fabric.
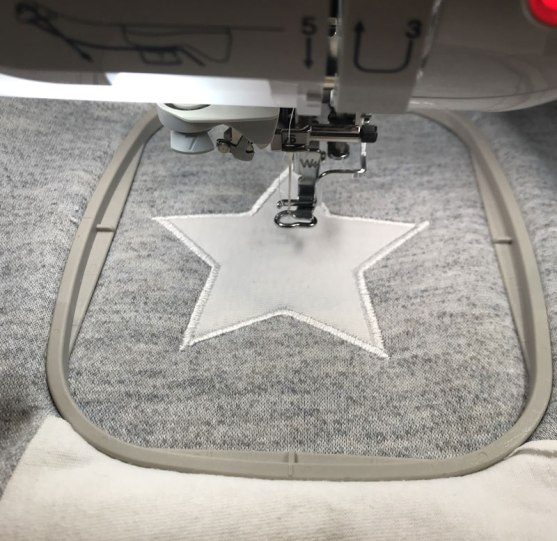
Once you’ve cut away the excess fabric around your design you can load your hoop back into the machine, press start and watch it finish the satin stitching on your design.
You can now tearaway the excess stabiliser off the back of your fabric piece. Then continue to applique your fabric down until you have all of your star applique embroidery completed on your garment piece.
This is how easy it is to create a basic applique design with a very professional satin stitch border. I have used a commercial pattern to sew this bomber jacket below, however you can apply this technique to any garment, even to refashion a garment that you have in your wardrobe.


Thank you for this applique tutorial using Embrilliance Software. I see where I went wrong when making my applique square recently, this is so much easier to do. Jess
LikeLike
Will give this a try. Easy to understand directions. Thanks.
LikeLike
Very good instructions!
LikeLike